If you’ve landed on this page, it’s likely that you missed the critical Kindle e-reader update which cut off on March 22.
Amazon released the update to all its Kindle e-readers in February, up to and including the Kindle Paperwhite 5th generation but not the Kindle Fire tablets. The company warned that users would not be able to use some significant features such as downloading books and connecting to the Kindle Store if they missed the update. Hit play on the video above for all the details you need to know and click here to see a full list of devices requiring the update.
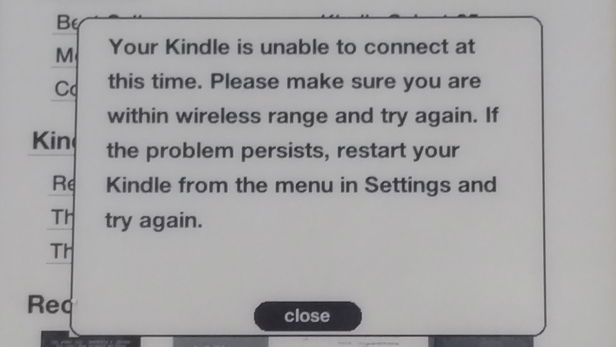
Now the deadline has passed, you can no longer get the update wirelessly and all said features have indeed been blocked. But fear not, for you can still get hold of the update manually using your PC, which will make your e-reader is functional once more. Read on below to see how it’s done:
Step 1 – download the update software on to your PC
The first thing you need to do is get the update software from Amazon’s website and download it on to your computer.
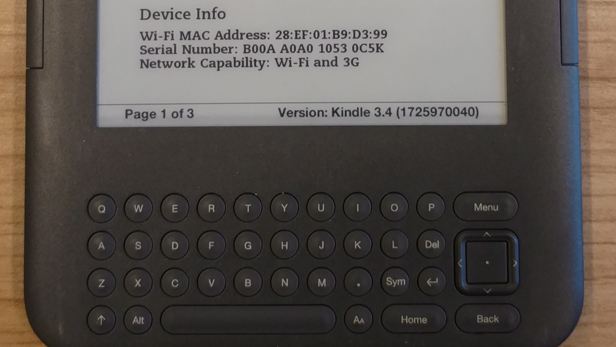
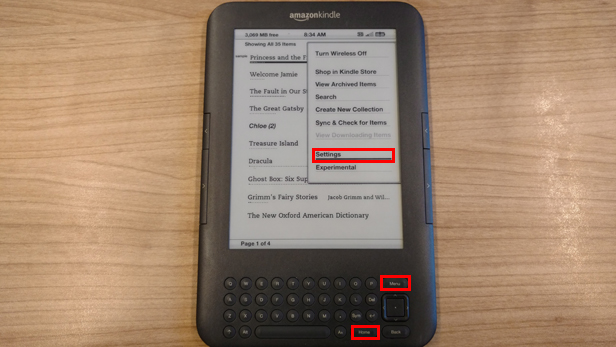
There is a different download for each Kindle e-reader, so make sure you know which model you’re updating. If you’re unsure, you can find it by going to Home, followed by Settings.
You should see the version somewhere – in our case, it’s at the bottom marked 'Version Kindle 3.4'. The 3 means we’re using a third generation Kindle. You may need to know some of the Device Info too, such as whether it’s Wi-fi only or with 3G too. Alternatively, you can check this page to try and identify which model you’re using.
When you’re sure which device you own, click on the relevant download link below, and download the latest software update listed.
Kindle (1st Generation)
Kindle (2nd Generation)
Kindle DX (2nd Generation)
Kindle Keyboard (3rd Generation)
Kindle Touch (4th Generation)
Kindle (5th Generation)
Kindle Paperwhite (5th Generation)
Step 2 – Connect your Kindle to your PC
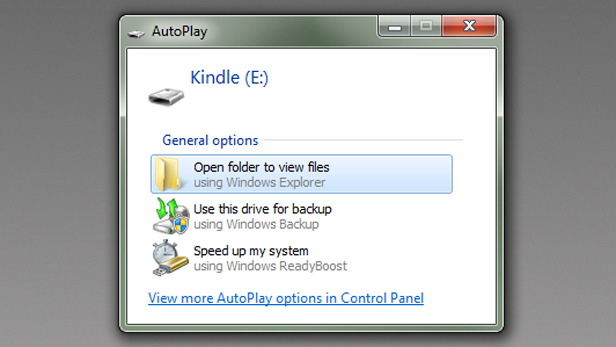
Once the download is complete, connect your Kindle device to your PC using a USB cable (which should have been provided with your Kindle when you first bought it).
Next, you need to access your Kindle from your PC, an alert may pop up asking you how you wish to proceed, in which case you should select Open folder to view files.
If not, just open the Start Menu, followed by Computer and then open your Kindle device.
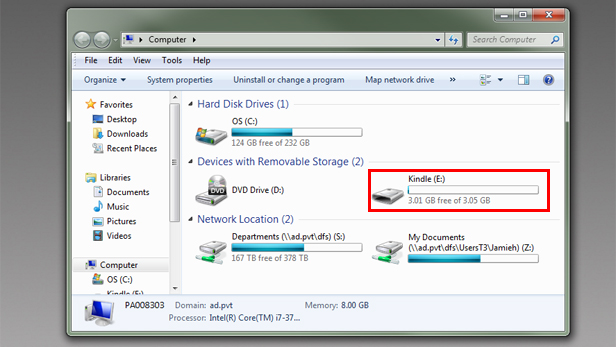
Next you will need to drag the update file to your Kindle’s drive – but be sure not to place it into one of the folders.
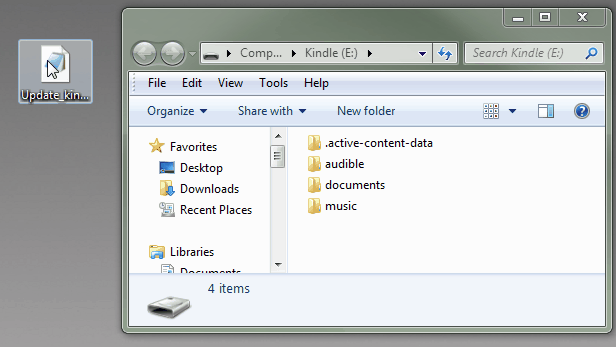
Wait for the transfer to complete, then safely eject your Kindle by clicking on the upward pointing arrow at the bottom right, clicking the USB icon and selecting Eject Amazon Kindle.
[Related story: Amazon Kindle Paperwhite – review]
Step 3 – Carry out the installation on your Kindle
From your Kindle, now go to Home and select Menu, followed by Settings.
Select Menu again and then choose Update Your Kindle.
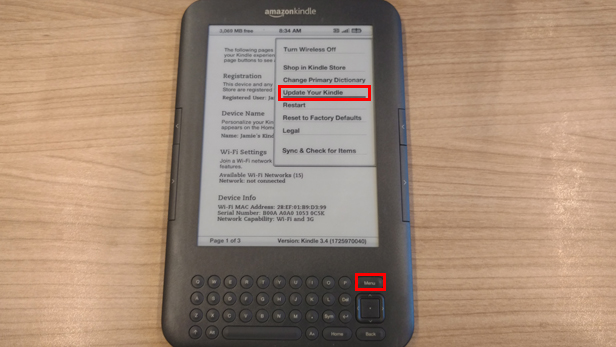
Hit OK and the update should go ahead. Once it is complete, restart your Kindle (if it doesn’t do so automatically) and full access will be restored as before.
Did you manage to successfully update your Kindle? Let us know how it went in the Comments section below.
![]()
No comments:
Post a Comment